In my experience, most people start automated trading backward. They look for a bot first, then try to figure out what it should trade.
I won’t deny that some of the new tech is quite enticing to use, especially with the rise of AI in trading. However, this seems to be the fastest way to hand a bad idea to a machine that will execute it with perfect discipline.
The truth is much simpler: you do not start with automation. You start with a strategy that makes sense, clear enough rules to repeat, and risk controls that protect you when the market stops behaving.
Today’s Goal
In this guide, we are not building some hedge-fund-grade black box from scratch. We will return to fundamentals by turning a simple idea with clear rules into a semi-automated workflow using TradingView.
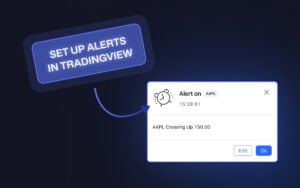
We have a simple goal today: make a bot that can alert us when the price does exactly what we asked it to do.
If you’re doubting what good that’ll ever do for you, allow me to let you in on a little secret. We did not start with our current version of Trading Signals, which scans dozens of markets in several timeframes. No sir. This is simply the result of a simple idea that we improved through thousands of iterations over the years.
Before we get started, I hope you’re aware of a bot’s capabilities and shortcomings so you can build an efficient one. If not, do give my introductory guide to automated trading a quick read first.
Step 1: Start With One Bot-Friendly Idea
If your setup depends on “market feel,” instinct, or ten different moving parts that change every day, it is not ready for automation.
A bot-friendly idea needs to be boring in the best possible way. It should be simple, repeatable, and clear enough that another trader could follow it without needing a call from you every five minutes.
That usually means starting with a setup that has three things: a clear trigger, a clear invalidation, and a clear market condition where the setup confirms.
For example, “alert me when price closes above a key resistance level” is too vague on its own. But “alert me when price closes above resistance during London or New York, with volume or momentum expanding” is already getting closer to something a machine can actually work with.
The difference is subtle but important. The former is an idea, but the latter is the beginning of a ruleset. A good starter idea usually comes from a setup you already understand manually. That could be:
- a breakout after a clean consolidation
- a pullback into trend support
- a retest of a session level
- a momentum continuation after volatility expansion
The exact setup matters less than the clarity behind it. If you cannot explain the setup in one sentence, it is probably too messy to automate right now.
So here is your first task: Write your setup idea in one sentence.
Something like:
- “Alert me when EUR/USD breaks yesterday’s high with momentum during the London open.”
- “Alert me when price retests the upper VWAP band in trend and closes back above it.”
- “Alert me when a clean range breaks with rising momentum and no major news nearby.”
That sentence is the foundation of everything that comes next. If the idea is vague, the automation will be vague. And vague automation usually ends in very precise losses.
Once you have that one-sentence setup, the next thing you should start understanding is the difference between conditions, confirmations, and filters. You do not need to learn code yet. But it’s pertinent to learn how to think in rule blocks.
You do not need to learn code yet. But you do need to learn how to think in rule blocks.
Read: How to use TradingView’s Strategy Tester?Step 2: Turn the Idea Into Exact Rules
Now we take your idea and turn it into something a bot can actually follow. At a minimum, your setup needs four things:
- entry condition: what exactly has to happen for the trade to trigger
- invalidation: what proves the setup is wrong
- exit condition: where the trade gets closed, either in profit or loss
- stand-aside condition: when the bot should do nothing, even if the setup looks close
Let’s understand with an example. A vague idea would be, “Alert me when EUR/USD breaks resistance with momentum.”
Here’s a much better version: “Alert me when EUR/USD closes above the previous session high on the 5-minute chart during the London open, with momentum expanding and no major news due in the next 15 minutes.”
See the difference? Now we are getting somewhere. You do not need to code this yet. But you do need to break it down like this:
- Entry: 5-minute candle closes above previous session high
- Confirmation: momentum is stronger than the last few candles / volatility is expanding
- Invalidation: price closes back below the broken level
- Exit: fixed target, trailing stop, or next key level
- Stand aside: skip if the spread is too wide, if the news is about to hit, or if the price has already moved too far before the signal.
Trust me, this stage will take more work than you’ll expect. You will usually find holes in your own logic once you try to write it cleanly. It is much better to discover those gaps here than after a bot starts sending alerts on garbage conditions.
Homework: What to learn next.
Once your setup is written properly, the next things worth learning are:
- How do TradingView alerts work?
- The difference between an indicator and a strategy
You still do not need to become a coder overnight. But by this point, you should be thinking like someone who is preparing a workflow, not just describing a chart idea.
Step 3: Build a Simple Workflow
Do not try to jump straight into fully automated execution. Start with a semi-automated workflow first. In plain English, that means your system should do the watching, and you should still do the deciding.
A simple workflow looks like this:
- Build your chart with only the indicators or levels your setup actually needs
- Define the exact condition you want to be alerted on
- Create an alert when that condition appears.
- Review the alert when it triggers.
- Decide whether the market context still supports the trade.
Let’s say your setup is “Alert me when EUR/USD closes above the previous session high during London open with momentum expansion.”
Your TradingView workflow could be as simple as:
- Mark the previous session high
- Use your chosen confirmation tool or condition for momentum.
- Create an alert when the price closes above that level.
- Get notified on desktop or mobile.
- Review the chart and execute only if everything still lines up
That is a very real first version of automation.
You are not asking the machine to manage your whole account. You are asking it to monitor a condition with more discipline than you can manually. That is how good automation starts. Small, useful, and specific.
📌 Pro Tip: Keep your chart clean. If your workflow depends on multiple indicators and conflicting signals, your alert logic will usually become weak before it becomes useful.
Homework: Task
Before the next step, your task is to set up one TradingView alert using the exact setup you defined in Step 2.
Once you try a bunch of things, you’ll learn how the alert conditions work in platforms like TradingView. And the difference between manual alerts and indicator-based alerts.
Read: Setting Up Alerts in TradingView – Pop-up, In-App, Email & MoreYou do not need to master all of that today. But you should know that alerts are usually the bridge between manual trading and deeper automation.
Step 4: Backtest and Paper Trade It
This is the stage where your “great idea” gets humbled a little. Don’t worry, it happens to the best of us. Most setups sound excellent until you actually test them. That is why we do this every time before we go live.
Start simple. Go back on the chart and manually review old examples of your setup. Look for the alerts you would have taken, the ones you should have skipped, and how the price behaved after the signal.
The goal here is not to produce a beautiful spreadsheet for social media. It is to determine whether your logic is clean enough to withstand market contact.
Once you have completed a basic historical review, move on to paper trading. This is where you stop playing with theory and start watching how the setup feels in motion.
Read: TradingView’s Paper Trading: Setup, Execution, Trading & LessonsTo achieve the best outcome, keep your review focused on a few practical questions:
- Did the alert trigger exactly where you intended?
- Did the market conditions actually support the trade?
- Was the invalidation level realistic?
- Did the exit logic make sense in real time?
- Was this a setup worth automating further, or just an idea that looked nice on one chart?
If you want to make this even more useful, log the next 20-30 alerts or paper trades from that setup. Nothing fancy. Just track what triggered, what happened next, and whether the setup followed your logic or exposed weaknesses in it.
And one more thing: do not obsess over making the backtest perfect. That is how people end up overfitting.
📌 Pro Tip: Do not try to engineer a system that never loses. Ensure your rule set makes sense often enough and in the right conditions to justify taking them seriously.
Read: Backtesting Smarter in TradingView: From Idea to Iteration in 2026Homework: What to learn next.
Once you have done this properly, start learning about:
- The difference between backtesting and forward testing
- What overfitting actually looks like
- How to compare paper results with what might happen in live execution
Step 5: Add Risk Controls Before Going Live
A bot without risk controls is neither efficient nor safe. Once you move from alerts and paper trades into anything even remotely live, the real job is no longer just finding setups. It is about making sure that one bad sequence, one messy session, or one flawed assumption does not cause unnecessary damage to your account.
At a minimum, your workflow should know when to stop.
For example, maybe your rule is simple:
- Risk no more than 1% per trade
- Stop after 2 losing trades in one session.
- Do not trade during major economic news.
- No entries outside your chosen session
- Pause the system if alerts start triggering in conditions they were not designed for
That is already a huge improvement over how most beginners approach automation.
This is also where you should start thinking about a kill switch. It sounds dramatic, but it’s really just a simple rule: stop everything if something unusual happens.
For this step, you have a simple task. Before we think about live deployment, write down these 3 things:
- maximum risk per trade
- maximum loss per day
- pause conditions
If those are not clearly defined, the workflow is not ready.
Homework: What to learn next.
Once you finish this part, start looking into:
- How traders define max drawdown
- Why kill switches matter in automation
- How session filters and no-trade windows protect systems from low-quality conditions
You do not need a complex risk engine yet. But you absolutely need rules that stop a simple mistake from becoming an expensive one.
Step 6: Go Live Small and Review Everything
Going live does not mean you suddenly trust the workflow completely. It means you trust it enough to test it with small, controlled risk.
Your first live deployment is not about making money. We must find the gap between how the setup behaved in testing and how it behaves in real execution, with real spreads and real emotions.
My advice? Start embarrassingly small. When the confidence comes in, you can start the game.
Use a size that is small enough to protect you, but real enough to make you pay attention. Once money is on the line, even a simple alert-based workflow feels different. You notice hesitation, slippage, and a lot more.
At this point, your job is not to optimize, but to observe. Note down answers to a few practical questions in a journal:
- Did the live alert arrive when expected?
- Did the setup still look valid by the time you reviewed it?
- Was the execution close to what you planned?
- Did spreads, slippage, or latency change the trade quality?
- Did you follow the workflow, or did emotion sneak back into the process?
This is also why you should not scale too early. A lot of traders get a few good signals, feel confident, and start increasing their size before the process has earned that trust. Bad move. A workflow proves itself through repetition, not through one good week.
Homework: Task.
Go live with the smallest size that still feels real, then manually review your first 10 live trades for timing, execution quality, spread/slippage impact, and whether you actually followed the workflow.
If those trades do not look close enough to your testing, do not scale. Fix the process first.
Bonus: Shortcut if You’re Not Ready to Build From Scratch
If all of this sounds useful, but you are not ready to build your own workflow yet, that is fine. Honestly, that is where many traders usually are.
A product like Trading Signals gives you a cleaner entry point into the same broad idea. Instead of building the entire workflow yourself from Day 1, you get access to structured signals with a defined entry, stop-loss, take-profit, and timeframe.
In other words, much of the scanning and setup work is already being handled for you, while you remain responsible for execution, sizing, and risk.
Trading Signals is not there to replace your thinking. It is there to give you structure while you build experience. You still have to decide whether the signal aligns with your account, risk, and market conditions.
And that is really the bigger point of this whole article. You do not have to jump from fully manual trading straight into advanced automation. There is a middle ground. Alerts, semi-automated workflows, and structured signal systems all sit in that middle ground.
SM_Trader
SM_Trader is a highly experienced coder and strategy developer who brings the most complex algorithms to life. As a member of MENSA, the prestigious organization for individuals with intelligence scores in the top 2% of the world, he combines exceptional analytical skills with a keen eye for numbers and statistics, empowering businesses to grow at the right pace and in the right direction.
More from SM_Trader